
The Making of SADIE
Posted by Amy Bolin on 2nd Oct 2014
Here is a step by step peek at a custom piece I did 2012/2013...
This piece is carved from wood then painted and varnished. The finished piece measured approximately 9" by 20"
The first step, after discovering the perfect piece of wood was to sketch and start creating the different depths for foreground, background and subject.
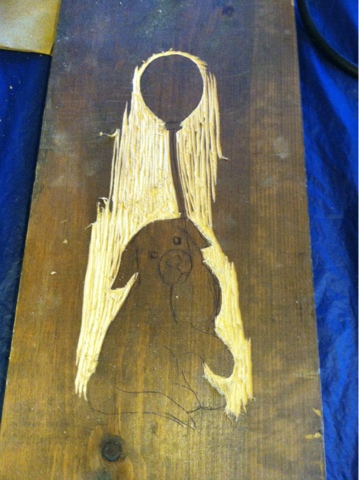
After the sketch, I really look for depth and start playing with textures. The image will start to take shape in the next step...

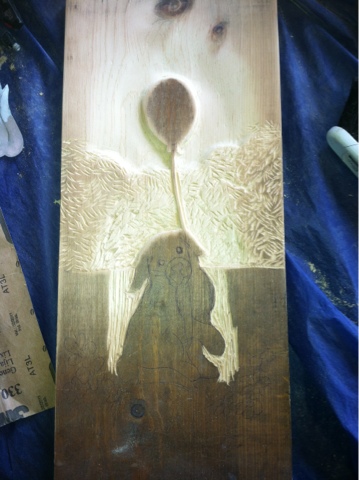
Now that I've found my depth and decided on the textures for my different areas I finish carving. The balloon needs to jump out of the sky and the Saint Bernard pup cannot get lost in the foliage. I carefully remove wood until the image starts to come to life.


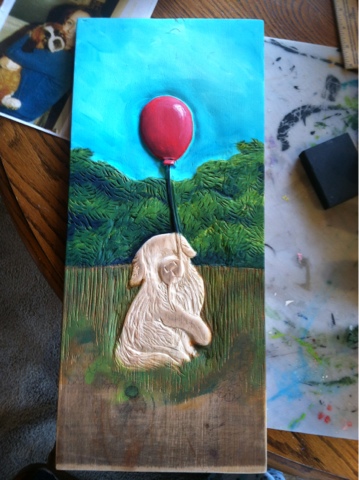
Now that the carving is complete its time to color Sadie's world! Sometimes the hardest part for me because there are millions of choices! Every part of the painting is a mixture of two, three, sometimes four or more colors. The better to breathe life into my imaginary world.


Time to add the finishing touches:
Fine details are picked out and messy edges retouched.
I still have to add texture and color to the flat foreground.
And finally, a personal message from Sadie to Mom...
Made from the heart for a good friend in memory of her beloved first Saint, Sadie.
:)
I hope you've enjoyed this creative journey!

